Showing posts with label Dinner. Show all posts

Tuesday, February 7, 2017

#348: Gnocchi with Tomatoes, Basil and Olives


An Italian comfort food inspired by a gnocchi recipe from Giada De Laurentiis, this dish has been tweaked a little to add sardines, red pepper flakes and tons of garlic to create a spicy sauce.

Ingredients:

Gnocchi:

1 russet potato, baked and cooled.
Salt and pepper to taste
1 large egg beaten(use 3 Tblspns)
¼ cup all-purpose flour

Sauce:

Sardines (boneless) - 1 can
Whole tomatoes can- 1 large
3 large cloves of garlic chopped fine
A pinch of crushed red pepper.
Basil leaves-3/4 cup
Kalamata olives-1 cup
Lemon juice and zest of 1 lemon.
Extra virgin olive oil, salt and pepper to taste.

Directions:
  1. Scoop out the flesh of the baked potato into a large bowl and toss the skin.
  2. Mash it well with salt and pepper and add 3 tablespoons of beaten egg into it.
  3. Sprinkle the flour over the potato mixture and stir well to form a dough. Knead it until smooth for 30 seconds.
  4. On a lightly floured board divide the dough into 4 equal pieces and roll each one into a ½ inch thick roll. Then cut each roll into 1/2 inch pieces. Place a fork upside down on a surface and roll each I inch piece over it to create grooves.
  5. Place a large pot of water on medium heat and let it come to boil. Add salt and the gnocchi and let it cook until they rise to the surface (about 1 to 2 mins).
  6. For the sauce: Heat olive oil and add the garlic, chili flakes and when it sizzles add sardines and do not stir too much or sardines will crumble. Add coarsely chopped olives and lightly crushed tomatoes and let simmer. Then add salt and pepper, juice and zest of lemon and gnocchi let gently heat the sauce
  7. Add pasta water if it gets too thick and when done, remove from fire and serve with torn basil and grated Parmesan (optional).


Tuesday, January 19, 2016

#344: Rosemary Garlic Lamb Chops


With N arriving in DC from SF a few days after Christmas, we decided to delay the full Christmas festivities.  So on Christmas day itself our parents and I decided to still do a small but nice Christmas dinner, and wait to do the bigger meal when she got into town. 

I was thinking about the best dish to make when I came across these gorgeous thick lamb loin chops at the grocery store.  Now, I've never tried my hand at making lamb chops, so I definitely had to look through a few recipes to understand the right temperature and preparation style to cook the perfect chop, and this is what I came up with.  I was going for the crunchy/slightly charred exterior and juicy interior, and that's what I happily ended up chowing down on.  My dad enjoyed his chops thoroughly (and he's a tough one to please)!

Rosemary Garlic Lamb Chops

Ingredients:
6 lamb loin chops (about 1 1/4 inch thick chops)
1/4 cup rosemary leaves
8 garlic cloves (I like this extra garlic-y, but 4 large cloves would work just as well)
2 teaspoons salt
cracked black pepper
1/4 cup extra-virgin olive oil

Directions:
  1. In a blender toss in the garlic cloves, rosemary, olive oil and some salt & pepper.  Blend until it turns into a thick marinade.  
  2. Place the chops flat in a glass container.  Pour the marinade evenly over the chops and massage into both sides.  Refrigerate for at least 2 hours.  (I marinated them for 4 hours.)
  3. Preheat oven to 400 degrees Fahrenheit.  In a hot pan sear the chops on each side for 3 minutes and then place on an aluminum foil lined baking sheet. If you have a cast iron skillet this could work perfectly, if you can fit the chops all in (otherwise, try cooking in batches).  Searing for 3 minutes will give the outside of the chop a nice charred crust, before cooking the chops through in the oven.  
  4. Place the chops in the oven and cook with the timing below, based on how you like your chops cooked. 
  5. Once you take them out let your meat rest!  This means keeping it on the tray, not moving it, and covering it lightly with a sheet of foil for about 10 minutes.  
I was cooking these for my dad, so I cooked them well done like he likes.  

10 minutes - medium rare
15 minutes - medium
20 minutes - well cooked

To join my juicy lamb chops on our dinner plates, I made some super easy crescent rolls which I smothered with homemade vegetable cream cheese.  I also oven roasted asparagus and eggplants - simply cut them per my instructions below and drizzled them with olive oil and a sprinkle of salt and pepper and cooked them in the oven. Then tossed a balsamic glaze over them after they were cooked. 

1 medium purple eggplant, sliced into 1/3 inch slices
1 bunch of asparagus

Asparagus faces the endless controversy (to snap or not to snap).  I snapped the ends off for this particular recipe, basically the idea is to bend the end of the asparagus until it naturally snaps off, thereby removing the tough part of the asparagus.  This feels super wasteful sometimes, so in the alternative merely peeling the outside a bit can help.  Take your pick! 

The eggplant slices take about 30 minutes, turning them halfway through.  The asparagus takes just 20 minutes.  This is all at the 400 degree Fahrenheit temperature used for the lamb chops. 


The greased up asparagus before they head into the oven.


After 3 minutes and flipped over, just look at that charry goodness!


And, we flip again!


This is what they should look like right before you put them in the oven to finish cooking. 


Tuesday, January 5, 2016

#342: Thai Red Curry Chicken


It is probably too much of a generalization to say "everyone likes Thai food," but most of the time I really do believe that.  It's the type of cuisine people order for office lunches (once everyone gets tired of pizza), and it just seems to be what my friends and family can all agree to when we're making that difficult take-out decision.  Red Curry is this perfectly creamy Thai dish that when you ladle over warm jasmine rice, oh don't get me started! The aroma of the red curry paste cooking with coconut milk is incredible, you'll want to set that take-out menu aside and start making this easy dish at home.  

Thai Red Curry Chicken
Ingredients:
1.25 pounds skinless, boneless chicken breast, cut into bite size pieces
2 tablespoons oil
4 oz can of red curry paste
8 ounces sliced bamboo shoots
13.5 fl oz. coconut milk + 1 can filled with water
1 green bell pepper, chopped into bite size pieces
1 onion, finely chopped
1 teaspoon salt
2 teaspoons fish sauce

Directions:  
  1. Heat the oil in a large skillet over medium-high heat.  Add the chicken pieces, cook and stir for about 3 minutes.  
  2. Mix in the onion, bell pepper and red curry paste.  Cook for 3-4 minutes.  
  3. Add the coconut milk + water, bamboo and fish sauce.  Bring to a boil, reduce the heat and simmer until the chicken is cooked through, about 10 minutes. 
Serve over a warm bowl of jasmine rice.  


I bought the Thai ingredients below from my local Asian grocery store, but you can easily buy these from most grocery stores these days.  


Tuesday, August 25, 2015

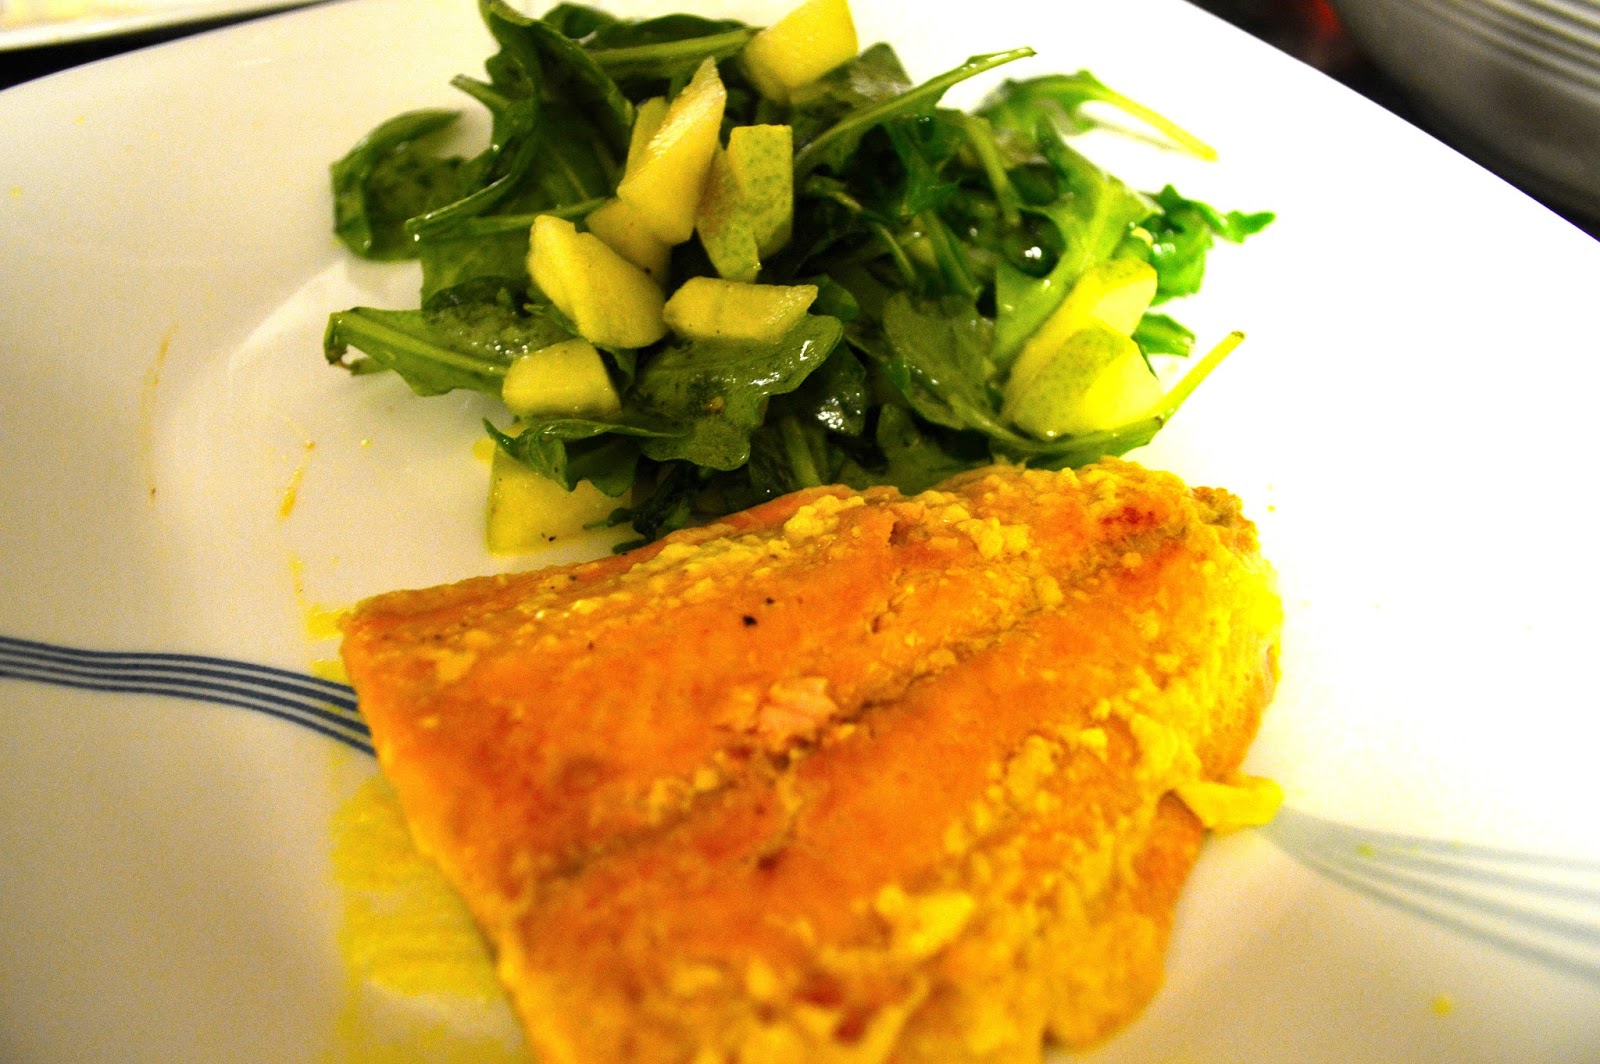
#330: Honey Mustard Salmon with Arugula and Pear Salad


I love salmon marinated with honey.  This honey mustard salmon is absolutely great.  While I used Dijon mustard, honestly you could use plain old yellow mustard.  I think the bitter flavors would contrast so well with the salmon and honey.  Plus, the arugula and pear salad follows the similar theme of sweet and bitter, which I absolutely love. 

This meal works as the perfect summertime dinner, light and healthy.  It might be easier to cook this in the oven, but sometimes (like when you run out of tin foil and hate cleaning a baking sheet) cooking on the stove top just seems easier. 


Honey Mustard Salmon - Serves 4

4 salmon filets
1 garlic clove, chopped
3 tbsps Dijon mustard
2 tbsps honey
1/2 tsp apple cider vinegar
1/2 tsp black pepper
1/2 tsp salt
1 tbsp extra virgin olive oil 
  1. In a shallow dish combine Dijon mustard, honey, vinegar, garlic, salt and pepper.  Add your fish to the mix and coat both sides. 
  2. Place oil in a saute pan on medium heat.  Remove the salmon filets from the honey-mustard mixture one at a time and add to the pan.  Make sure that just a touch of the mixture is coated on the fish, but that it is not drenched while it enters the pan because then it will splatter. 
  3. Cook for 3-4 minutes on each side.  
I used skinless salmon, but if yours has skin, cook that side first for 6 minutes, flip, and cook on the other side for 3-4 minutes.  Also, if you have a grill pan, definitely use it, it will make for gorgeous grill marks.  If you prefer to use the oven cook at 400 degrees Fahrenheit for 10 minutes.  

Arugula and Pear Salad - Serves 4

1/4 cup extra virgin olive oil
2 tbsps lemon juice
1 tsp honey
1/2 tsp Dijon mustard
1/2 tsp salt
1/4 tsp black pepper
3 pears (Barlett is what I used), cored and sliced lengthwise 
6 cups arugula
  1. In a small bowl, mix together olive oil, lemon juice, honey, dijon mustard, salt and pepper. 
  2. In a large bowl toss together the arugula and pear.  If you had pumkin seeds, pine nuts or walnuts (anything with crunch effect) to add, this is the time to do it.  
  3. Then drizzle your salad dressing over the salad and toss.  Top with gorgonzola cheese or grated parmesan. 

Tuesday, August 11, 2015

#329: Zucchini Noodles


I finally joined the zucchini noodle, or "zoodle," bandwagon.  With everyone trying to be healthier lately, and honestly, just not being as hungry in the summer month, zucchini noodles are the perfect fix when you're just craving a big bowl of pasta with a ton of sauce on time - I'm an extra sauce kind of girl. 

With zoodles, you can prepare them in a pan with a little olive oil, in a vegetable steamer, or just boil them for about 5 minutes like I did.  Since making this recipe I've tried just tossing the spiralized zucchini into a pan with olive oil and it works just as easily, so really everyone can make this to their preference...there's no real recipe.  So, this post will be a bit different and I'll just highlight to you the three ways I've made zoodles.  

I recently went out and bought a spiralizer.  I should've taken a picture of it for you all, but next time. It's a small, cupboard friendly version.  When you share a kitchen with a roommate, it just makes things all the more easier and saves you some counter space.  

This was my first venture into making zucchini noodles, and I have to say it was super simple and the perfect weeknight dinner.  I actually tried parsnip noodles the other day - yes, you can spiralize pretty much any veggie and turn it into a base for a fantastic fake-noodle based dish.  

This time I cheated and mixed my zoodles in with some gluten-free pasta I had laying around in my refrigerator.  


Then I topped the whole dish with an easy spaghetti sauce I made, with ground turkey, carrots, tomato sauce, garlic, basil and oregano. 

And, I mean of course you have to top the whole thing with basically a pound of grated Parmesan.  Just kidding!  But, I think it's okay to be heavy handed here. 


Zoodles via Sauce Pan:  Simply spiralize (or thinly slice or use a vegetable peeler) your zucchini.  I think one large one is sufficient for one serving.  Heat 1 tablespoon olive oil in a sauce pan.  Add your zucchini noodles and cook for 3-5 minutes or until tender. 

Zoodles via Vegetable Steamer:  Place the spiralized zucchini in your vegetable steamer.  Fill a pot with about an inch and a half of water, place in your vegetable steamer and let the pot come to a boil.  Cover with a lid and cook for 3 minutes or until tender.

Zoodles via Boiling:  Place 3/4 cup of water in a small pot. Bring it to a boil and add in your spiralized zucchini noodles.  Cook for 3-5 minutes or until tender.  Drain the remaining water, and you're ready to eat! 


Tuesday, August 4, 2015

#328: Spicy Garlic-y BBQ Chicken


Who doesn't enjoy Barbeque Chicken, particularly in the summer months?  I know many of you enjoy juicy perfectly cooked chicken, and I mean, of course I do, but I also love having portions of chicken charred a bit.  It's the best of charred ends with a tender juicy chicken thigh (or breast).  This time around I made chicken thighs and instead of hauling them out to the grill, I just gave these an initial hot sear on the stove, and popped them into the oven to finish cooking (with a quick baste in the middle of the cooking time).  These turned out fantastic.  

The recipe is a combination of a Chipotle Chicken Marinade my roommate and I made and used on chicken last month, with some of this amazing Alamo Spicy BBQ Sauce my mom picked up on her recent trip to San Antonio.  It made for a spicy, sweet and garlic-y finish to the chicken.  With a side of collard greens,  I was completely content! 


Spicy Garlic-y BBQ Chicken - Serves 2

4 Chicken Thighs, skinless and boneless
1 cup barbeque sauce
3 habanero peppers, chopped
1/2 cup Chipotle chicken marinade
1/2 tbsp McCormick Jerk Seasoning
1/2 tbsp salt

Directions

  1. I made the marinade used in this recipe for Chipotle Chicken over a month ago and had some saved over, so I used 1/2 cup of this marinade.  I recommend making it and saving it, because it is absolutely fabulous.  But, if you'd prefer not to, I would just recommend using 2 ancho peppers (rehydrated and blended) + four garlic cloves.  If you prepare this mixture it will work just as well. 
  2. After you've done either, then we can proceed with the recipe.  Chop up your habanero peppers.  If you want less heat, take out the veins and the seeds.  
  3. In a bowl add your barbeque sauce, the Chipotle marinade (or ancho pepper + garlic mixture), McCormick Jerk Seasoning and salt.  Mix thoroughly with a spoon or whisk. 
  4. Add your chicken thighs to the bowl and coat thoroughly with the marinade.  It might seem like there's a lot of marinade, but trust me you'll want the extra for basting during the cooking process. 
  5. I let the chicken marinate overnight, but if you don't have time 1 hour is fine.  
  6. When you are ready to cook, preheat the oven to 400 degrees Fahrenheit. 
  7. Then take out a pan and add 1 tbsp olive oil to the pan.  Allow the heat to rise to medium-high.  Remove the chicken thighs from the marinade and add to the pan.  Make sure that you take off as much of the marinade from the outside of the chicken before adding to the pan to avoid splatter.  Let it sear for about 1 minute per side.  
  8. Place the seared chicken in an oven safe casserole dish.  Baste with half of the marinade.  Cook in oven for 25 minutes. 
  9. Then take out and baste with the remaining marinade.  (Note - You can remove the chopped habanero peppers if you would prefer).  Turn the heat to high broil and let the chicken broil for 5 minutes.  
Serve with a side of collard greens, green beans, macaroni and cheese, or potato salad!  


Tuesday, July 28, 2015

#327: Chicken Thighs Stewed with Chickpeas, Onion and Cabernet


I'm not going to sit here and make some wild claim that this is truly an authentic Moroccan dish, but I kind of like to think there's a bit of Moroccan inspiration in this one.  Maybe it's the cinnamon/paprika, chickpeas going on?  In either case, this is a rather mild dish, meaning I didn't add a crazy amount of hot spices as I usually do.  This is such a great cold weather dish, too bad it's 90 degrees outside right now! In either case, it's delicious and warm, and not too difficult to make. 


Yes, this chicken is overcrowded in the pan, give me a break here! Besides, that's what makes the whole dish turn into a stew-y situation?  Yep, that's an excuse.


Chicken Thighs Stewed with Chickpeas, Onion and Cabernet

Ingredients:


2 lbs skinless boneless chicken thighs

2 tbsps hot sauce
3/4 cup white flour
1/2 tsp ground cinnamon
1 tsp paprika
2 tsps salt
1 tsp pepper
3 tbsps canola oil
1/2 yellow or red onion, sliced thin
2 tsps chopped garlic
3/4 can of chickpeas (garbanzo beans), drained and rinsed
1/2 can tomato paste
3/4 cup red wine (I used Cabernet Sauvignon)

Directions:
  1. Prepare your dredging mixture.  Place the flour, cinnamon, paprika salt and pepper on a plate and mix together with a fork.  
  2. Prep your thighs.  Take a cast iron skillet or dutch oven -- or just use a nice handy sauce pan like I did.  Add your canola oil and turn the heat to medium.  
  3. Place the chicken thighs in your plate of flour one at a time and lightly coat with the flour mixture on all sides.  Add to the pot or pan you're using.  
  4. Turn the heat to high and cook for 2 minutes on high heat on each side.  Turn to medium low heat, cover and cook for an additional 5-7 minutes.  I had to cook my chicken in two batches, so repeat these directions as many time as you need for your batches.  Use half the oil for each batch.
  5. Between batches be sure to wipe out the water and oil to avoid splatter, before adding your next bit of oil.  Once the chicken is cooked (most of the way through - 90%), then keep them to the side and spoon over them the hot sauce (I used tabasco). 
  6. In the same pan, toss in garlic, onions - cook till translucent, then add chickpeas.  Cook for another 5 minutes.  Add tomato paste and 1/4 cup wine. Mix thoroughly and let cook for about 2 minutes.  
  7. Then place your chicken back into the pan with the onion-chickpeas mixture.  Add the rest of the wine and 2 cups of water.  Turn the heat down to medium-low/low heat (should be simmering) and cook covered for 20 minutes.
Serve this dish with quinoa or pilaf with toasted almonds.  

And, in case you mess anything up while making this dish or any other, you should try out the TalkToChef link floating on the side of the blog or even check out their iPhone app.  This tool is so creative, I can't believe it took someone this long to come up with it.  It's an interactive two-way video chat where you can talk to an actual CHEF who can either provide guidance to you on a recipe that needs some fixing or can answer any cooking-related questions you might have.  I mean this is completely free, so why wouldn't you try it out! 

Print Friendly

Print Friendly Version of this pagePrint Get a PDF version of this webpagePDF